Independent Toddler Self Care Bathroom Setup
As parents, we always strive to create a safe and stimulating environment for our children, especially when it comes to their personal care habits. I personally found the sooner I introduced my son to self care and was able to set up the environment for him, the faster he picked up on good life-long habits such as brushing his teeth, flossing, washing his hands, brushing his hair, and blowing his nose.
I had seen all the IKEA play kitchen DIY hacks online but that didn’t work for us because I wanted to start this project for my son when he was only 16 months old and it was too tall for him. I needed something about 18 inches high. Finding the perfect play kitchen set that suited his size was quite a challenge.
The Products I used
**Products Used to Create the Setup**
- 18-inch play kitchen set (chosen based on my toddler's height)
- Water pump
- Mason jars (one for clean and one for dirty water) and labels
- Waterproof pad
- Child lock
- Stick-on wallpaper set
**Products Used for Self Care**
Check out my Amazon Shop for the different products I put in the Self Care station to encourage my son to care for himself.
- Toothbrush
- Toothpaste
- Floss
- Tissues
- Washcloths
- Hairbrush
The Setup
Today, I'm excited to share my DIY project—a customized bathroom sink and cabinet designed for my 16-month-old toddler! In this blog post, I'll take you through the step-by-step process and highlight all the products I used to bring this adorable and functional addition to our home.
Step 1: Finding the Right Play Kitchen Set
I began my project by searching for a play kitchen set that would be the perfect height for my little one. After scouring various options, I found an 18-inch kitchen set that was not only safe for my toddler but also easy for him to access.
Step 2: Assembling the Set (minus the sink)
I waited until it came in the mail (like an excited little kid) and when it arrived I assembled about 90% of the set. I left off the sink faucet, back wall, stove top, and knobs.

Step 3: Designing the Perfect Look
To make the bathroom sink and cabinet visually appealing, I lined the top of the play kitchen counter with a waterproof liner pad. This not only adds a layer of protection but also brings a touch of style to the setup. I also used a cute stick-on wallpaper set to cover the fake kitchen stove knobs, making the play area look more personalized and charming.
I waited to add the sink and first chose to style it.
I found a roll of almost marble style liner paper and clear liner at Home Depot and I applied those to the top being careful how I folded the edges taking into account I would need to wrap around the edge of the sink and outside edge.
Step 4: Adding Running Water
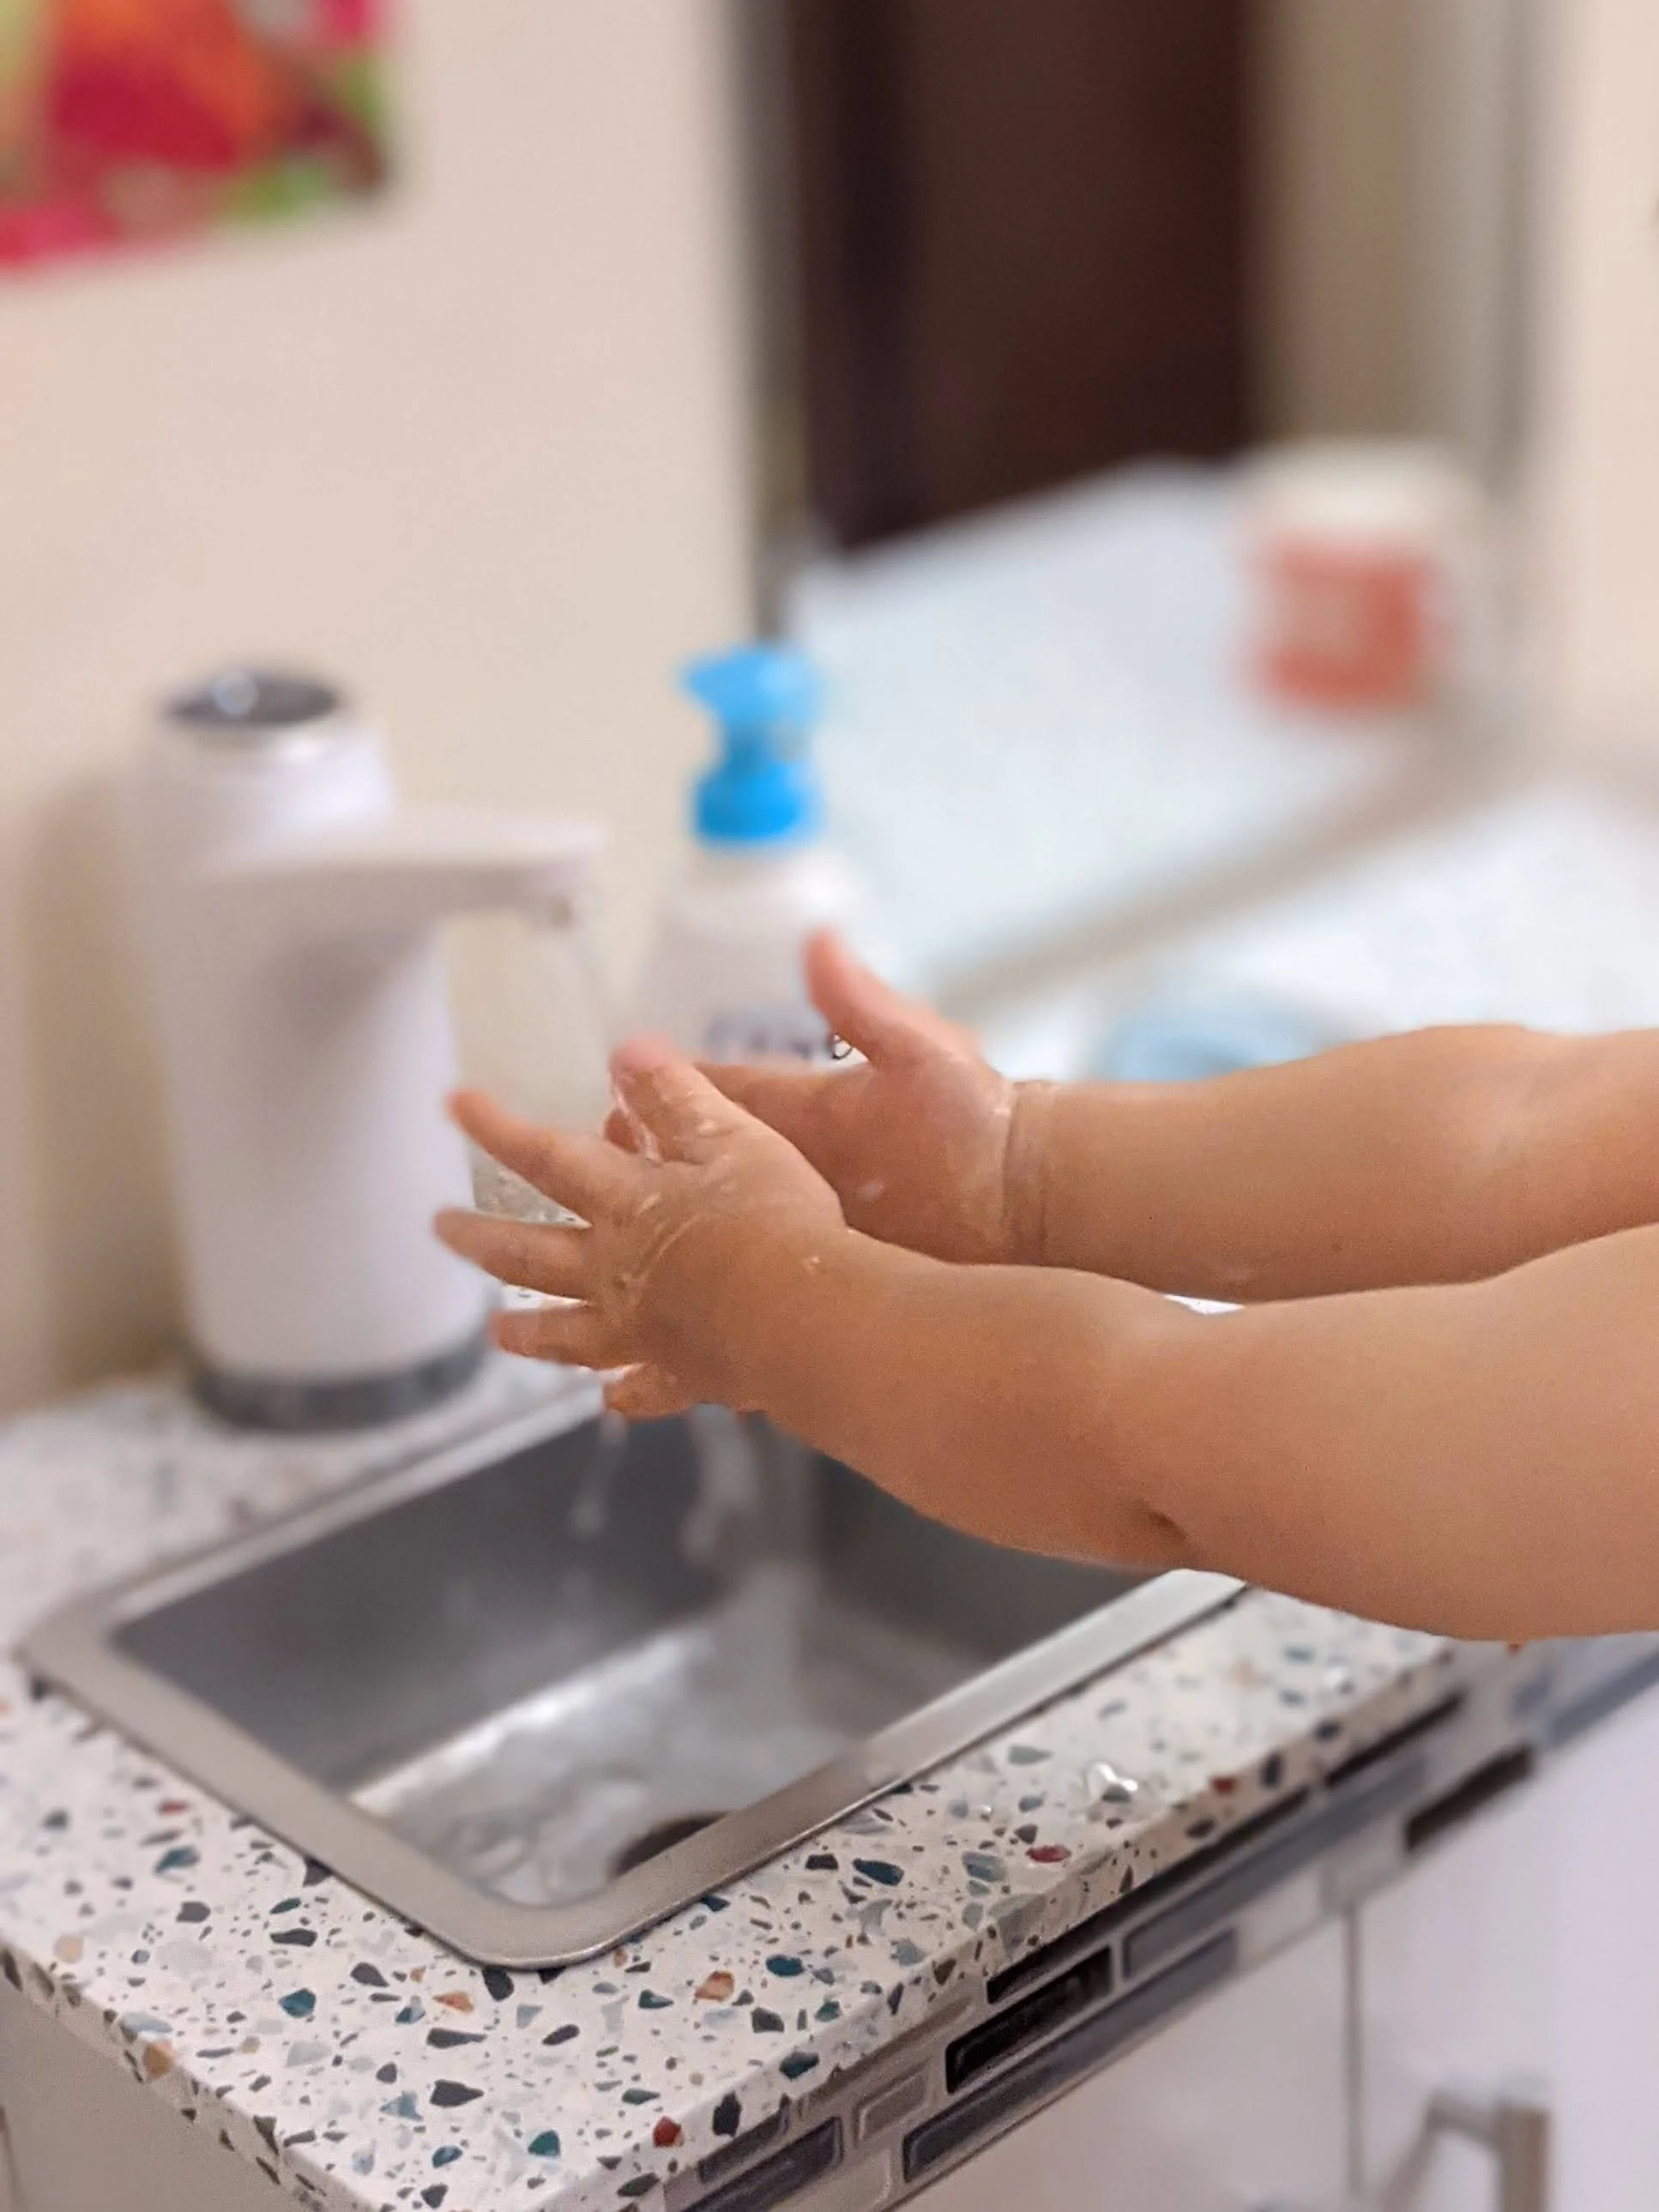
To make the play kitchen set more realistic, I decided to incorporate running water. For this, I used a water pump and a couple of mason jars. I filled one jar with clean water and connected it to the pump, which then transported the water to a small faucet on the kitchen counter. To keep the water clean and hygienic, I placed another jar underneath the sink to collect the dirty water. This also serves as an excellent opportunity to teach my child about conserving water and being responsible.
Step 5: Ensuring Safety and Durability
Safety was my top priority throughout this project. I used a waterproof pad to protect the cabinet play set from water damage and spills. Additionally, I added a child lock to secure the cabinet doors, ensuring that my toddler couldn't access any harmful items. This way, he can explore his little sink and cabinet without any worries.
Step 6: Organizing Personal Care Items
One of the main purposes of this bathroom sink and cabinet was to encourage my toddler's self-care routine. I used the cabinet to store his personal care items, such as floss, a toothbrush, hairbrush, tissues, and washcloths. This not only keeps everything within his reach but also instills good habits from a young age.
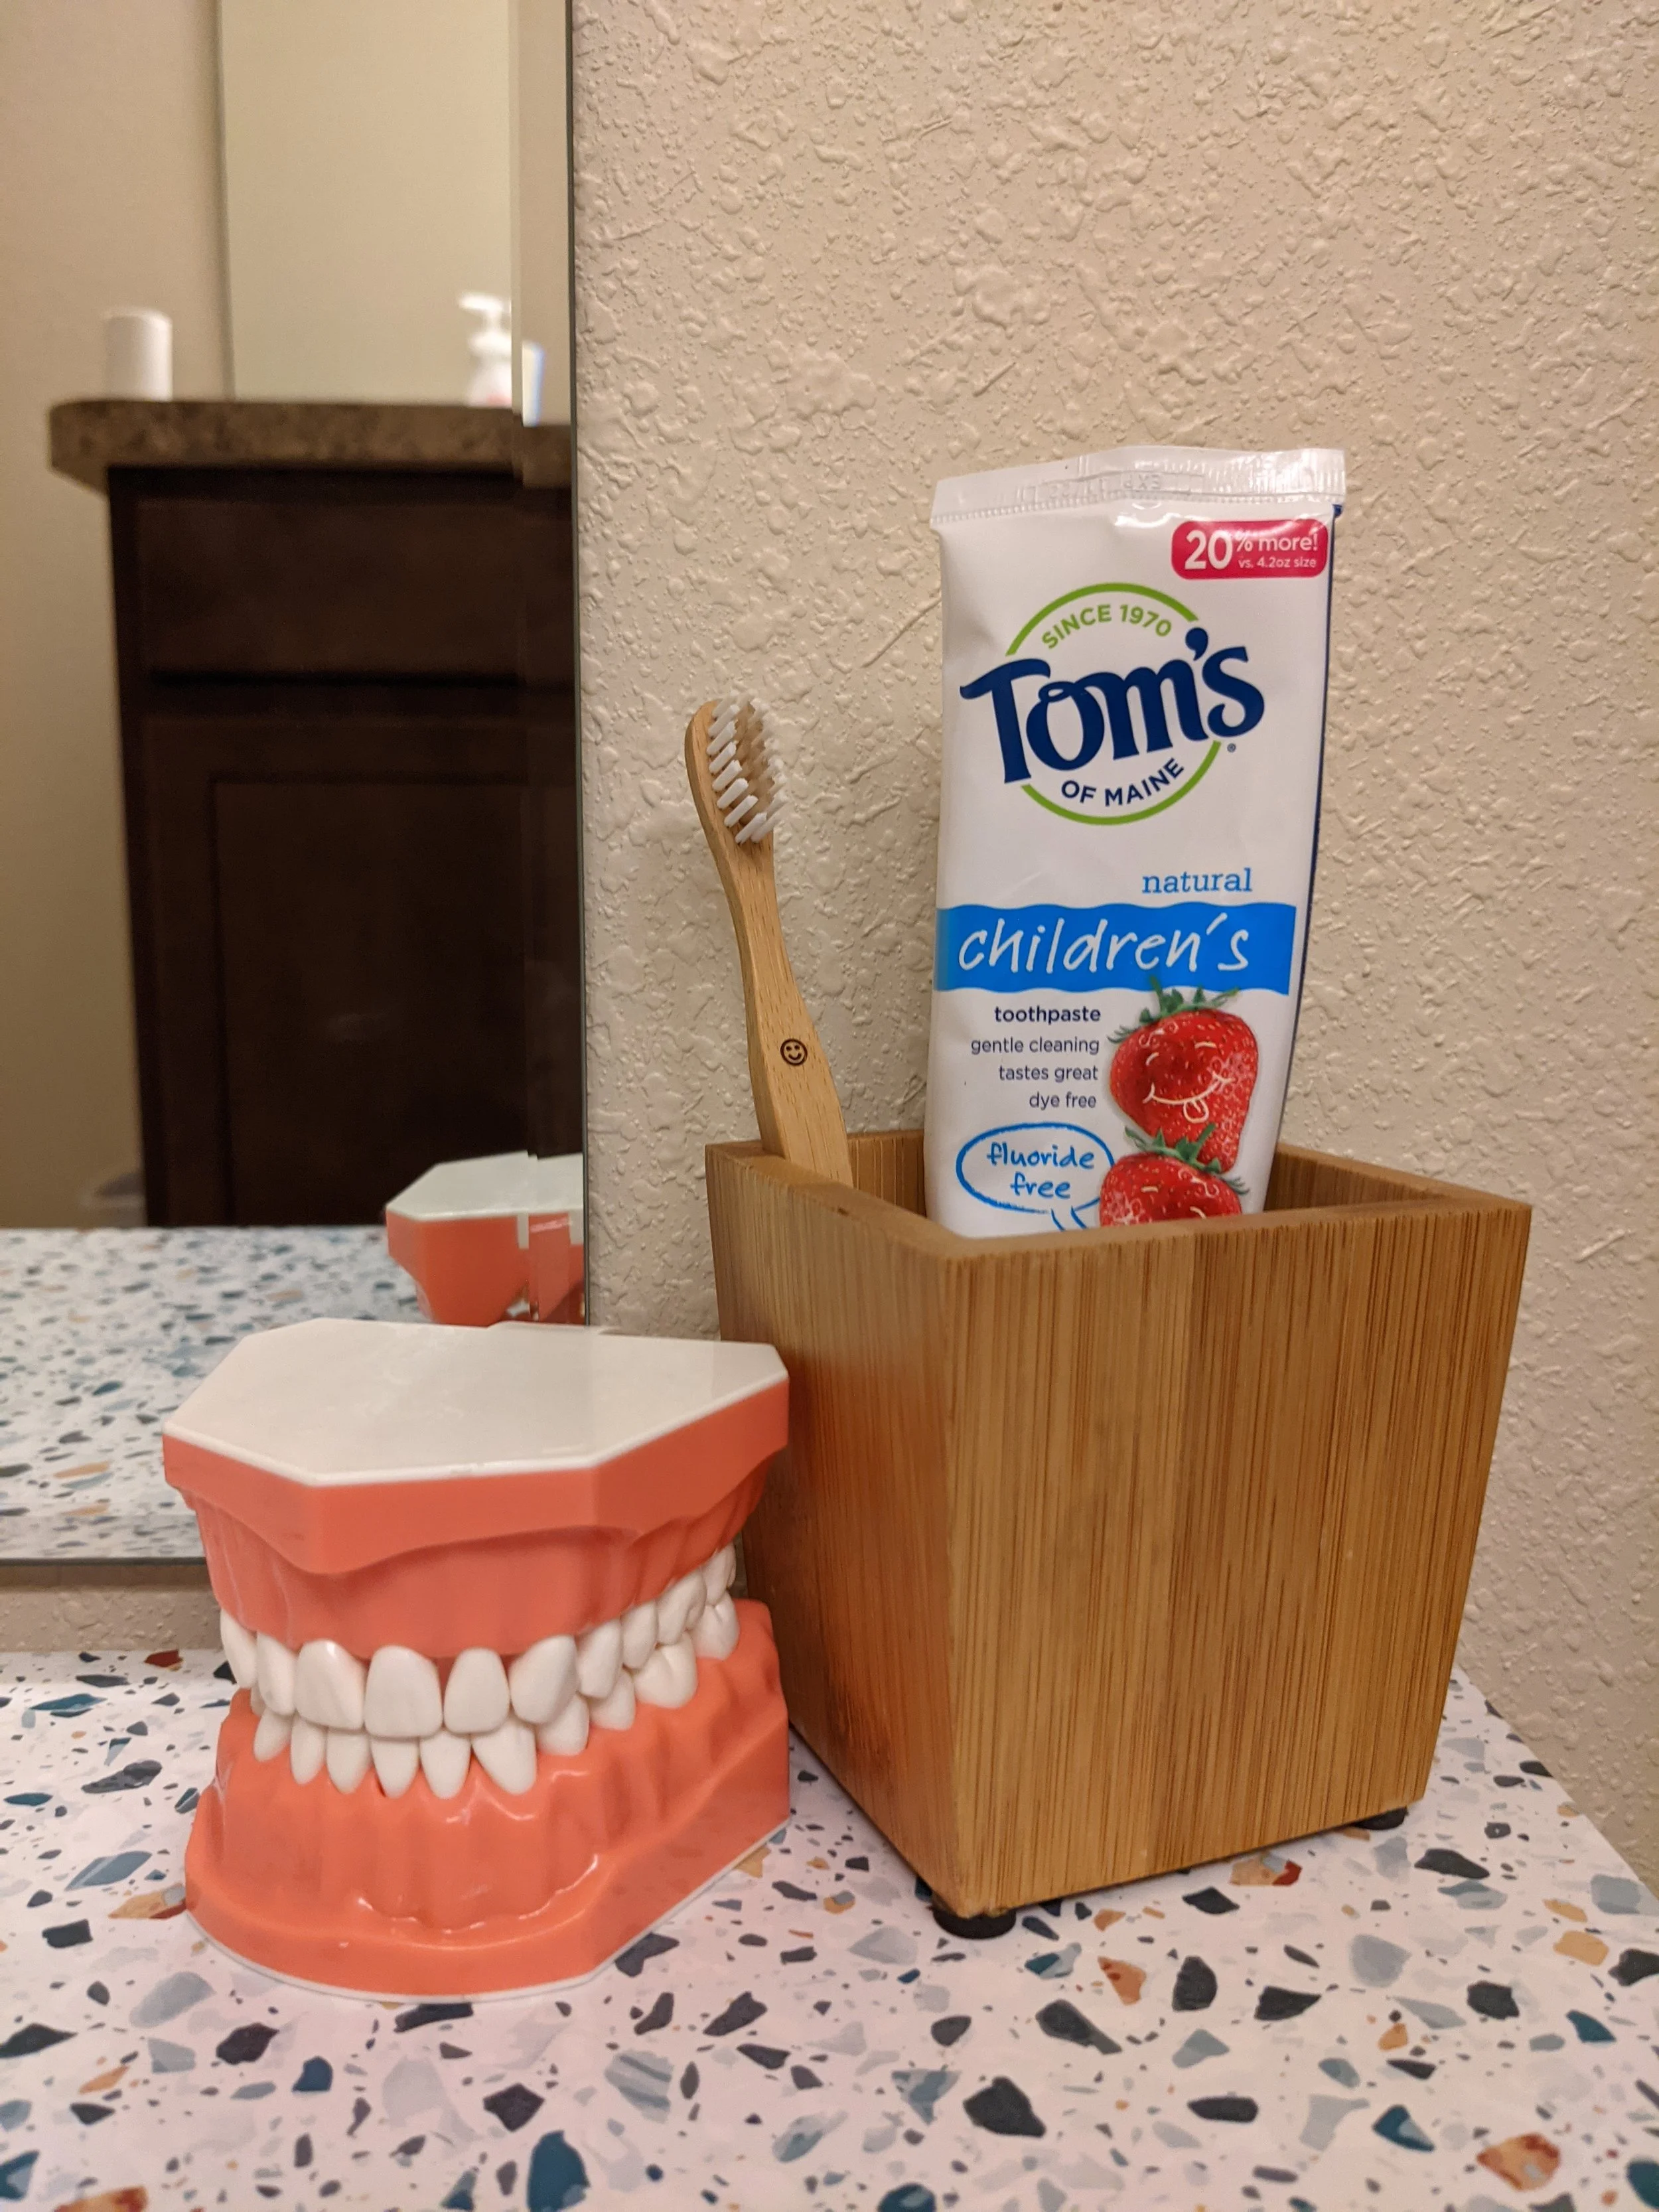
Later after using this setup for a while, my son decided he wanted his toothbrush and toothpaste out on the counter like us and so I found a cup for him.
He also took an interest in learning about flossing and how to brush so I got a model set that he could practice with. I like that this one has gaps in-between the teeth to practice flossing.
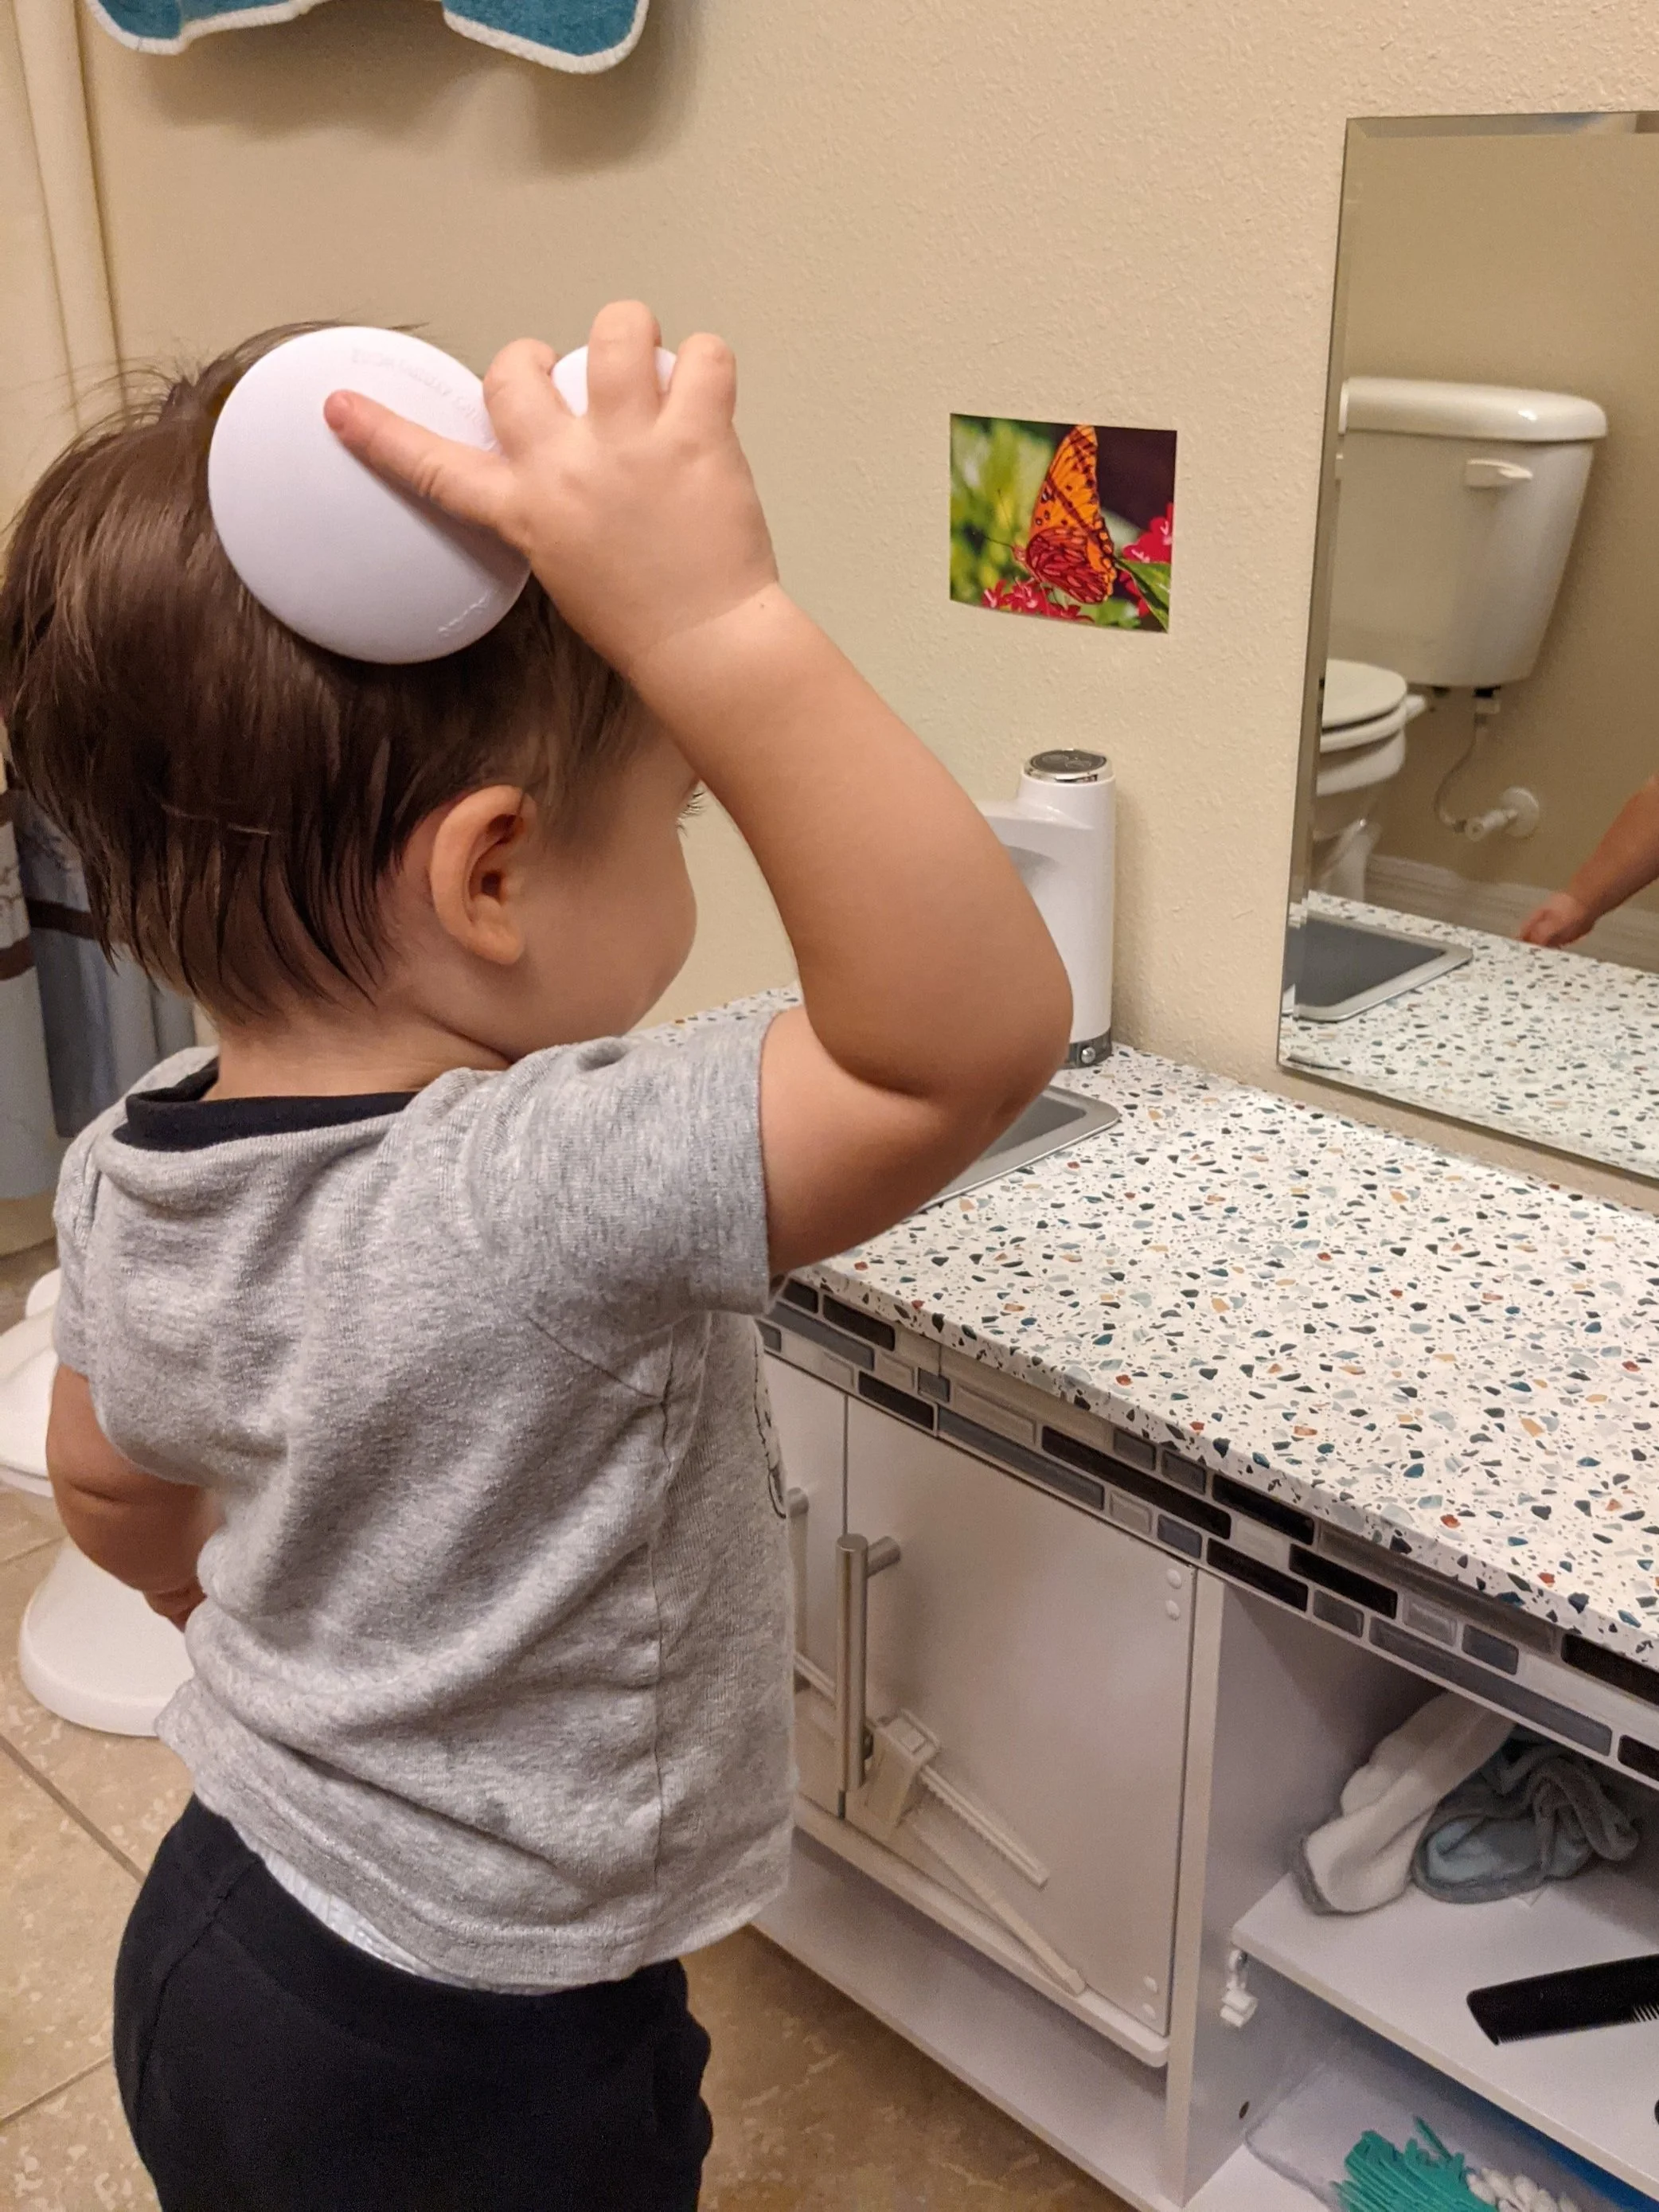
Step 7: Adding a Mirror
Finally, I hung an unbreakable mirror on the wall at his height. This allows my little one to see himself and become more familiar with his own reflection. It really helped him to make the connection of paying close attention to what he is doing while he is brushing his teeth or brushing his hair. It also adds an element of fun and interaction during his self-care activities.
Teaching How to Use & to Respect It
Of course, after the setup there comes the unveiling, which is of course the fun part to see their eyes open wide! After all the excitment, I showed him how to push the button to pump the water, find the soap, wash his hands with bubbles for 20 seconds, rinse, and dry his hands.
I showed him where all of his belongings were and allowed him to move them overtime, if he desired. He would even help me to put clean washcloths back in the cabinet when we folded laundry.
I believe teaching him to use the space appropriately and respect it is just as important as teaching him how to wash his hands.
There were a few times where he got carried away with the water, as all kids love to do, but overall he loved this setup and use it as intended. I believe this setup helped him to independently care for himself consistently throughout toddler years and now even into his preschool/primary school years.
Creating a personalized bathroom sink and cabinet for my 16-month-old has been an incredibly rewarding experience. Not only does it enhance his imaginative play, but it also promotes a sense of independence and self-care at an early age. With some creativity and the right products, you too can craft a delightful and functional play area for your little one. So, go ahead and get started on your DIY project, and watch your toddler's eyes light up with joy and curiosity!